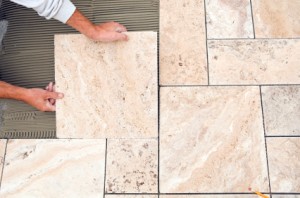
 Hello everyone and welcome to our new series of DIY tips
This week we will be looking at tiling. Floor and wall tiles are very popular and come in a range of sizes, shapes and colours for you to mix and match with. They are ideal for bathrooms, kitchens, porches, conservatories and halls they are easy to clean and are water and heat resistant.
First you should measure the floor or wall area allowing for some extra tiles for breakages and any repairs in the future. You should make sure that the area is clean, flat and dry before starting.
You will need the tiles, tile spacers, a notched trowel for laying adhesive to create ridges lines that are a good sticking surface for the tiles, a tile cutters, adhesive and grout. To begin its is a good idea to lay out the tiles on the floor and then cut each tile before mixing the adhesive as it goes off very quickly and is only workable for approx 30 minutes.
When you have cut all of your tiles to the correct shapes you can stack them making sure you keep them in the correct order. You can now mix the adhesive. You must leave a 6mm Gap around the perimeter to accommodate the tiles movement Spread only enough adhesive to cover an area of about one square, press ceramic tiles firmly into position then twist slightly to bed them in. Place the next tile alongside using a plastic tile spacer to obtain evenly spaced gaps. Continue until you have run out of adhesive then apply more adhesive and start.
When the tiles have been in place long enough to dry you need to fill grout into the joints. The grout should be a complimentary color to the tiles. You should use a sponge or to force the grout into all the gaps, wiping off the excess with a sponge as you work. Allow to dry then polish with a dry, clean cloth. Remember not to walk on the edges or corners of the tiles until the tiles have been grouted and the grout is then dry.
For advice or to install any of these recommendations please log onto www.tradesmen.ie and we can source the right tradesman for you.


